XML represents Extensible Markup Language. XML is a markup
language similar as HTML used to depict information. XML labels are not
predefined in XML. We should characterize our own Labels. Xml as itself is well
decipherable both by human and machine. Additionally, it is adaptable and easy
to create. In Android we use xml for planning our formats on the grounds that
xml is lightweight language so it doesn't make our design weighty.
In this article we will go through the essential ideas of xml in Android and distinctive XML records utilized for various reason in Android. This will help you recorded as a hard copy a UI code to plan your ideal UI.
Basics Of User Interface:
The entire idea of Android UI is characterized utilizing the
order of View and ViewGroup objects. A ViewGroup is an imperceptible holder
that sorts out youngster sees. These kid sees are different gadgets which are
utilized to make the various pieces of UI. One ViewGroup can have another
ViewGroup as a youngster component as demonstrated in the figure given beneath:

Here in above Outline ViewGroup (Direct Format) contains one ViewGroup (for
example Relative Layout)and two View(Button and TextView). Further two more
View (for example 2 EditText ) are settled inside Relative Format ViewGroup.
Note that one format can be settled in another design.
The below code snippet will explain the above image in better way. Paste it
in activity_main.xml:
<?xml version="1.0"
encoding="utf-8"?>
<LinearLayout
xmlns:android="http://schemas.android.com/apk/res/android"
android:orientation="vertical" android:layout_width="match_parent"
android:layout_height="match_parent">
<Button
android:id="@+id/buton1"
android:layout_width="wrap_content"
android:layout_height="wrap_content"
android:text="Button"/>
<TextView
android:id="@+id/textView1"
android:layout_width="wrap_content"
android:layout_height="wrap_content"
android:text="sample Text"
android:layout_marginTop="15dp"
android:textSize="30dp"/>
<RelativeLayout
android:layout_width="match_parent"
android:layout_height="match_parent">
<EditText
android:id="@+id/editTextName"
android:layout_width="wrap_content"
android:layout_height="wrap_content"
android:hint="First Name" />
<EditText
android:id="@+id/editTextLastName"
android:layout_width="wrap_content"
android:layout_height="wrap_content"
android:hint="Last Name"/>
</RelativeLayout>
</LinearLayout>

Each Android application screen has a few parts like button,
Text or pictures (images). These are contained inside the ViewGroup. Formats are the
best models for ViewGroups. The various sorts of format in android are Linear Layout, Relative Layout, Absolute Layout, Table Layout and Frame Layout.
Different XML Files Used in
Android:
In Android there are a few xml documents utilized for a few
unique purposes. Beneath we characterize every single one.
1. Layout XML Files: Layout xml files are utilized to characterize the genuine UI(User interface) of our application. It holds all the elements(views) or the apparatuses that we need to use in our application. Like the TextView's, Button's and other UI components.
Location in Android Studio:
You will find out this file inside the res folder and
inside it there is another folder named layout where you will
get all the layout files for their respective activities or fragments.

Basic Layout XML Code:
Below we show activity_main.xml file in which we have two TextView’s.
<!-- RelativeLayout in which we set green color for the background --><RelativeLayout xmlns:android="http://schemas.android.com/apk/res/android"xmlns:tools="http://schemas.android.com/tools"android:layout_width="match_parent"android:layout_height="match_parent"android:background="@color/greenColor"tools:context=".MainActivity"><TextViewandroid:id="@+id/firstTextView"android:layout_width="wrap_content"android:layout_height="wrap_content"android:layout_centerHorizontal="true"android:layout_margin="20dp"android:padding="10dp"android:text="First Text View"android:textColor="@color/white"android:textSize="20sp"android:textStyle="bold" /><!-- second TextView --><TextViewandroid:id="@+id/secondTextView"android:layout_width="wrap_content"android:layout_height="wrap_content"android:layout_below="@+id/firstTextView"android:layout_centerHorizontal="true"android:layout_margin="20dp"android:padding="10dp"android:text="Second Text View"android:textColor="@color/white"android:textSize="20sp"android:textStyle="bold" /></RelativeLayout>2. Manifest xml File(Mainfest.xml): This xml is utilized to characterize every one of the parts of our application. It includes the names of our application packages, our Activities, receivers, services and the permissions that our application needs. For Example – Assume we need to utilize web in our application then we need to characterize Web consent in this document.
Location in Android Studio:
It is located inside app > manifests folder

Defining Internet Permission in AndroidManifest.xml
Below we show the AndroidManifest.xml file and define the
Internet Permission in that file.
<?xml version="1.0" encoding="utf-8"?><manifest xmlns:android="http://schemas.android.com/apk/res/android"package="com.qtsdigital.myapplication"> <!-- application package name -->
<uses-permission android:name="ANDROID.PERMISSION.INTERNET" /><!-- define Internet Permission --><applicationandroid:allowBackup="true"android:icon="@mipmap/ic_launcher"android:label="@string/app_name"android:theme="@style/AppTheme"><!-- add your Activities, Receivers, Services Names Here --><activityandroid:name=".MainActivity"android:label="@string/app_name"><intent-filter><action android:name="android.intent.action.MAIN" /><category android:name="android.intent.category.LAUNCHER" /></intent-filter></activity></application></manifest>3. Strings xml File(strings.xml): This xml file is used to replace the Hard-coded strings with a single string. We define all the strings in this xml file and then access them in our app(Activity or in Layout XML files) from this file. This file enhance the reusability of the code.
Location in Android Studio:

Below we show strings.xml file and define a string in the file.
<resources><string name="app_name">My Application</string><string name="hello_world">Hello world!</string><string name="action_settings">Settings</string><string name="login">User Login</string><!-- define your strings here --></resources>4. Styles xml File(styles.xml): This xml is used to define different styles and looks for the UI(User Interface) of application. We define our custom themes and styles in this file.
Location in Android Studio:
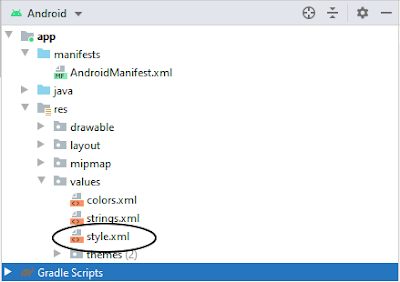
Below we show the style.xml file.
<resources> <!-- Base application theme. --><style name="AppTheme" parent="Theme.AppCompat.Light.DarkActionBar"><!-- Customize your theme here. --></style> </resources>5. Drawable xml Files: These are those xml files that are used to provide various graphics to the elements or views of application. When we need to create a custom UI we use drawable xml files. Suppose if we need to define a gradient color in the background of Button or any custom shape for a view then we create a Drawable xml file and set it in the background of View.
Below we show custom_drawable.xml file and create a gradient background color using style attribute.
<?xml version="1.0" encoding="utf-8"?><shape xmlns:android="http://schemas.android.com/apk/res/android"><!-- define start, center and end color for gradient --><gradientandroid:centerColor="#0f0"android:endColor="#00f"android:startColor="#f00" /></shape>
6. Color xml File (colors.xml): This
file is used to define the color codes that we used in our app. We simply
define the color’s in this file and used them in our app from this file.
Location in Android Studio

Below we show the colors.xml file in which we define green
and white color.
<?xml version="1.0" encoding="utf-8"?><resources><!-- define your colors Here --><color name="greenColor">#0f0</color><color name="white">#fff</color></resources>7. Dimension xml File(dimens.xml): This xml file is used to define the dimensions of the View’s. Suppose we need a Button with 50dp(density pixel) height then we define the value 50dp in dimens.xml file and then use it in our app from this file.
Location in Android Studio:

Below we show the dimens.xml file in which we define 50dp dimension
for Button height.
<resources><!-- Default screen margins, per the Android Design guidelines. --><dimen name="activity_horizontal_margin">16dp</dimen><dimen name="activity_vertical_margin">16dp</dimen><dimen name="btnheight">50dp</dimen></resources>
Thank you Sir for this article
ReplyDeleteNice tutorial.
ReplyDeleteAppreciate your effort 👍
ReplyDelete